
1Flow supports Push Notification Announcements, enabling you to trigger actions with push notifications.
Enable Push Notifications
Follow this Apple guide to enable push notifications for your app - Enable the push notifications capability.
Register Your App for a Device Token
1Flow provides several ways to register your app for Announcement push notifications and retrieve a device token.
Setup OneFlow Push Notifications for Sole Sender
If 1Flow is the only notification sender:
swiftOneFlow.setupAnnouncementPushNotification([.alert, .badge, .sound], fromClass: AppDelegate.self)
Implement these blank methods in your
AppDelegate:swiftfunc application(_ application: UIApplication, didRegisterForRemoteNotificationsWithDeviceToken deviceToken: Data) {} func application(_ application: UIApplication, didFailToRegisterForRemoteNotificationsWithError error: Error) {}
Setup OneFlow Push Notifications with an Additional Sender
If your app supports push notifications from both 1Flow and another server, follow these steps to integrate with an additional sender:
- Initialize OneFlow with an observer to receive push tokens:
swiftOneFlow.observer = self
OneFlow.setupAnnouncementPushNotification([.alert, .badge, .sound], fromClass: AppDelegate.self)
- Implement the
OneFlowObserverprotocol in yourAppDelegateor another suitable class to handle push token registration and notifications:
swiftextension AppDelegate: OneFlowObserver {

    func oneFlowDidGeneratePushToken(_ pushToken: String) {
        // Implement code to send the push token to the additional server
    }

    func oneFlowDidFailedToGeneratePushToken(_ error: Error) {
        // Handle error when push token generation fails
    }

    func oneFlowNotificationCenter(_ center: UNUserNotificationCenter, didReceive response: UNNotificationResponse, withCompletionHandler completionHandler: @escaping () -> Void) {
        // Handle user responses to notifications
    }

    func oneFlowNotificationCenter(_ center: UNUserNotificationCenter, willPresent notification: UNNotification, withCompletionHandler completionHandler: @escaping (UNNotificationPresentationOptions) -> Void) {
        // Handle notifications when the app is in the foreground
    }
}
Setup OneFlow Push Notifications with Firebase or Other Third-Party SDKs
If your app uses Firebase or other SDKs that manage
UIApplicationDelegate methods for push notifications, ensure there's no conflict with OneFlow:- Pass the push token obtained from Firebase to OneFlow:
swiftOneFlow.pushToken = yourAPNSToken
- Handle incoming notifications and pass them to OneFlow for processing:
swiftfunc userNotificationCenter(_ center: UNUserNotificationCenter, willPresent notification: UNNotification, withCompletionHandler completionHandler: @escaping (UNNotificationPresentationOptions) -> Void) {
    let userInfo = notification.request.content.userInfo
    OneFlow.appWillPresentRemoteNotification(userInfo)
    // Handle other presentation options as needed
}

func userNotificationCenter(_ center: UNUserNotificationCenter, didReceive response: UNNotificationResponse, withCompletionHandler completionHandler: @escaping () -> Void) {
    let userInfo = response.notification.request.content.userInfo
    OneFlow.appDidReceiveResponseForRemoteNotification(userInfo)
    // Handle other responses as needed
}
Ensure these steps are integrated correctly into your project based on whether you're supporting an additional sender or using Firebase or other third-party SDKs alongside OneFlow for push notifications.
Handle Actions
Add in
application(_:didFinishLaunchingWithOptions:):swiftOneFlow.appDidLaunchedWith(launchOptions)
Handle Rich Push Notifications
To support push notifications with images:
- Navigate to File → New → Target and select "Notification Service Extension".
- Name the extension (e.g., NotificationService) and finish. Xcode generates a
NotificationServiceclass subclassingUNNotificationServiceExtension.
- Ensure deployment target matches your main app.
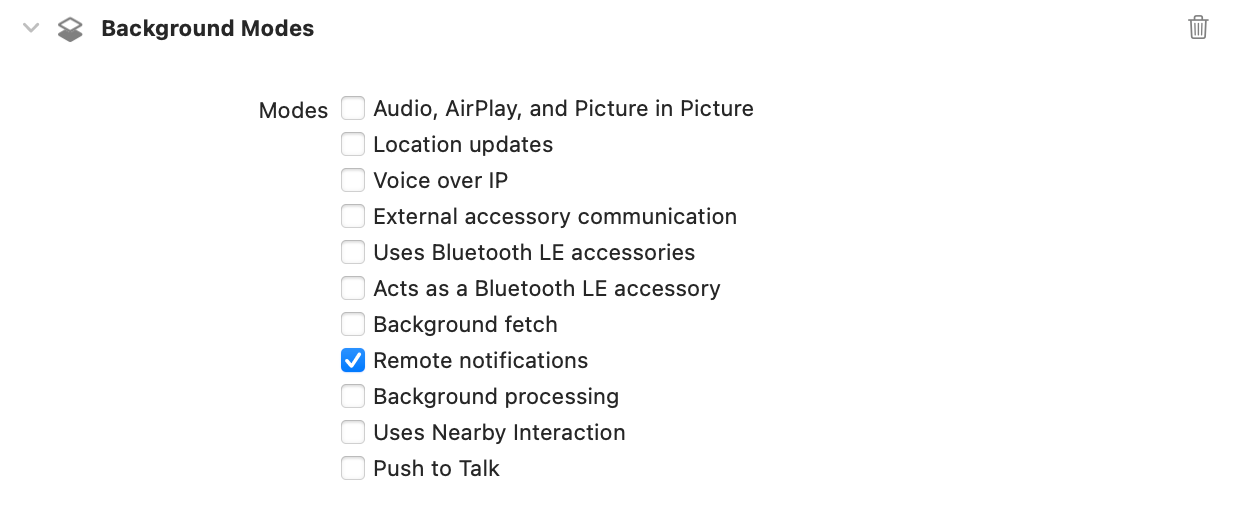
- In Signing & Capabilities, enable Background mode → Remote notifications if not already enabled.
- Finally modify your extension file code as follows:
swiftclass NotificationService: UNNotificationServiceExtension {

    var contentHandler: ((UNNotificationContent) -> Void)?
    var bestAttemptContent: UNMutableNotificationContent?

    override func didReceive(_ request: UNNotificationRequest, withContentHandler contentHandler: @escaping (UNNotificationContent) -> Void) {
        self.contentHandler = contentHandler
        guard
            let bestAttemptContent = (request.content.mutableCopy() as? UNMutableNotificationContent),
            let apsDic = bestAttemptContent.userInfo["aps"] as? [String: Any],
            let alertDic = apsDic["alert"] as? [String: Any],
            let imageURLString = alertDic["icon"] as? String,
            let imageURL = URL(string: imageURLString)
        else {
            return
        }

        if let imageData = try? Data(contentsOf: imageURL),
           let attachment = UNNotificationAttachment.create(imageFileIdentifier: "image.jpg", data: imageData, options: nil) {
            bestAttemptContent.attachments = [attachment]
        }

        contentHandler(bestAttemptContent)
    }

    override func serviceExtensionTimeWillExpire() {
        if let contentHandler = contentHandler, let bestAttemptContent =  bestAttemptContent {
            contentHandler(bestAttemptContent)
        }
    }
}

extension UNNotificationAttachment {
    static func create(imageFileIdentifier: String, data: Data, options: [NSObject : AnyObject]?) -> UNNotificationAttachment? {
        let tempDirectory = URL(fileURLWithPath: NSTemporaryDirectory())
        let imageFileIdentifier = imageFileIdentifier
        let fileURL = tempDirectory.appendingPathComponent(imageFileIdentifier)

        do {
            try data.write(to: fileURL)
            let imageAttachment = try UNNotificationAttachment(identifier: imageFileIdentifier, url: fileURL, options: options)
            return imageAttachment
        } catch {
            return nil
        }
    }
}
Dashboard Configuration and Testing for Push Notifications
Navigate to your 1Flow dashboard:
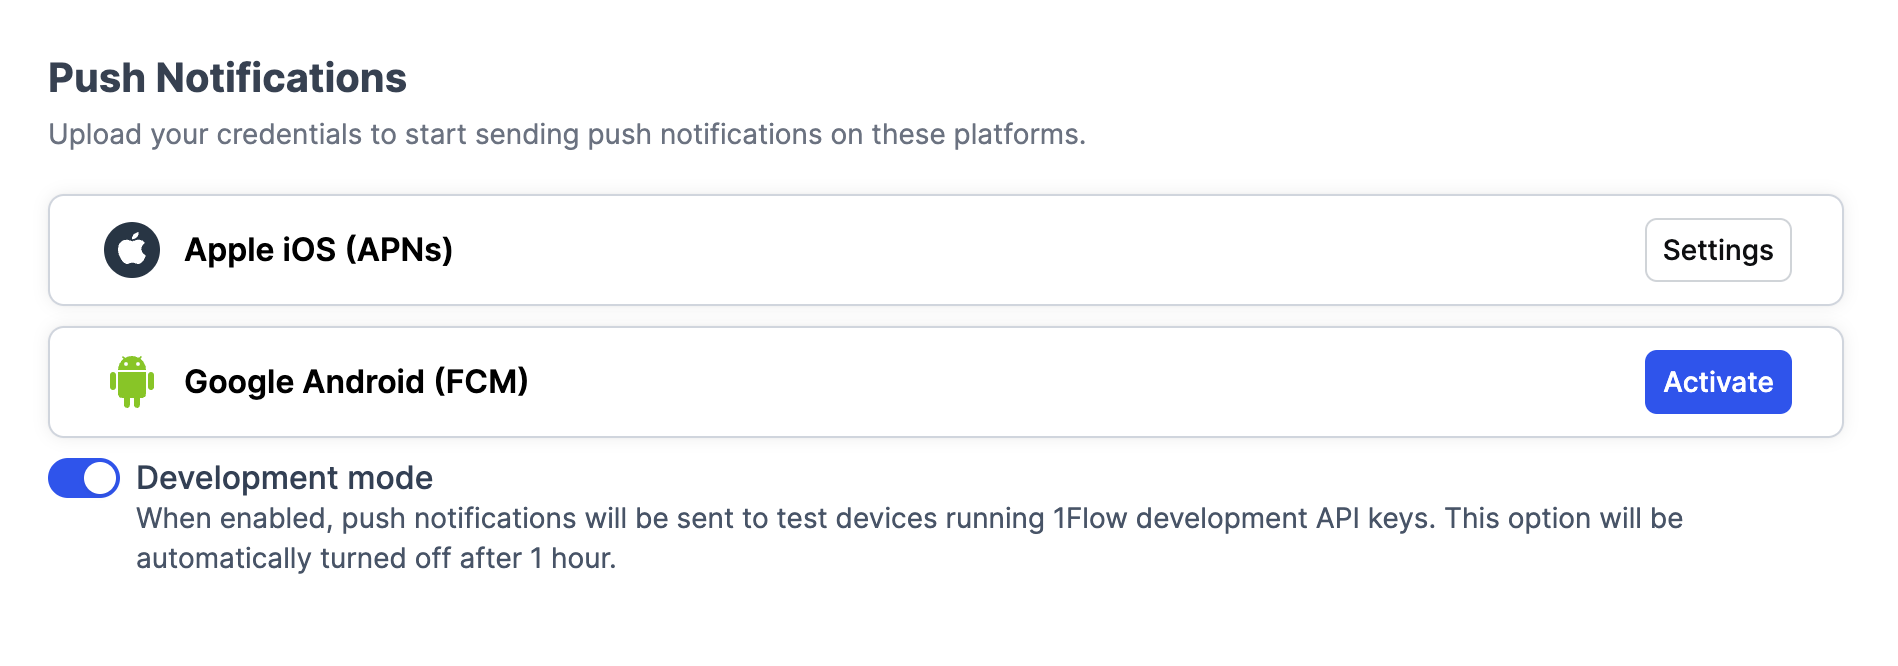
- Go to Settings → Project → Push Notifications.
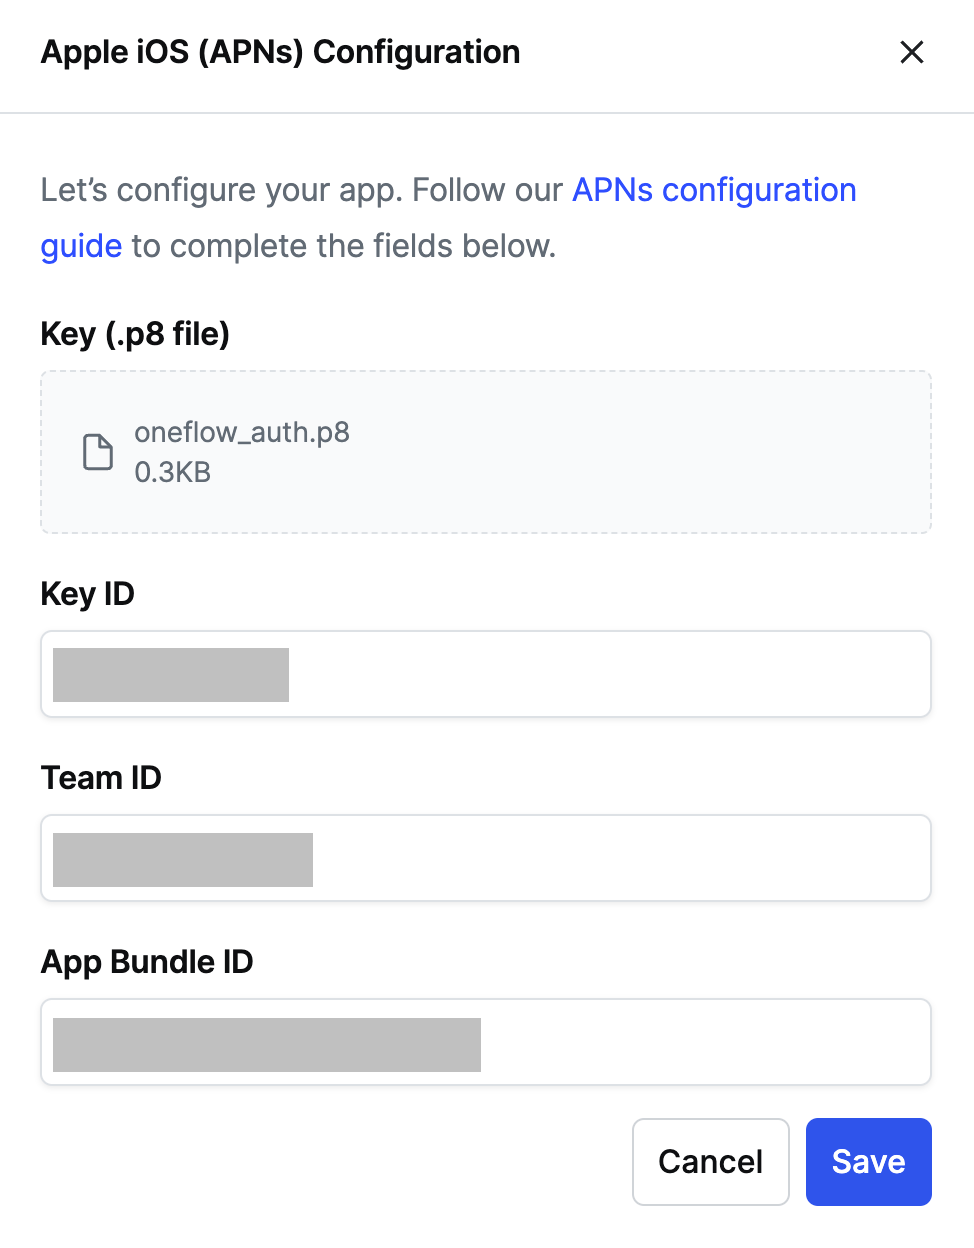
- Activate Apple iOS (APNs).
- Fill required details and save.
Follow this link to generate p8 key.
Test Push Notifications in Production
To test push notifications, you will need an iOS device as push notifications do not work on simulators. Follow these steps:
- Open the application on your iOS device.
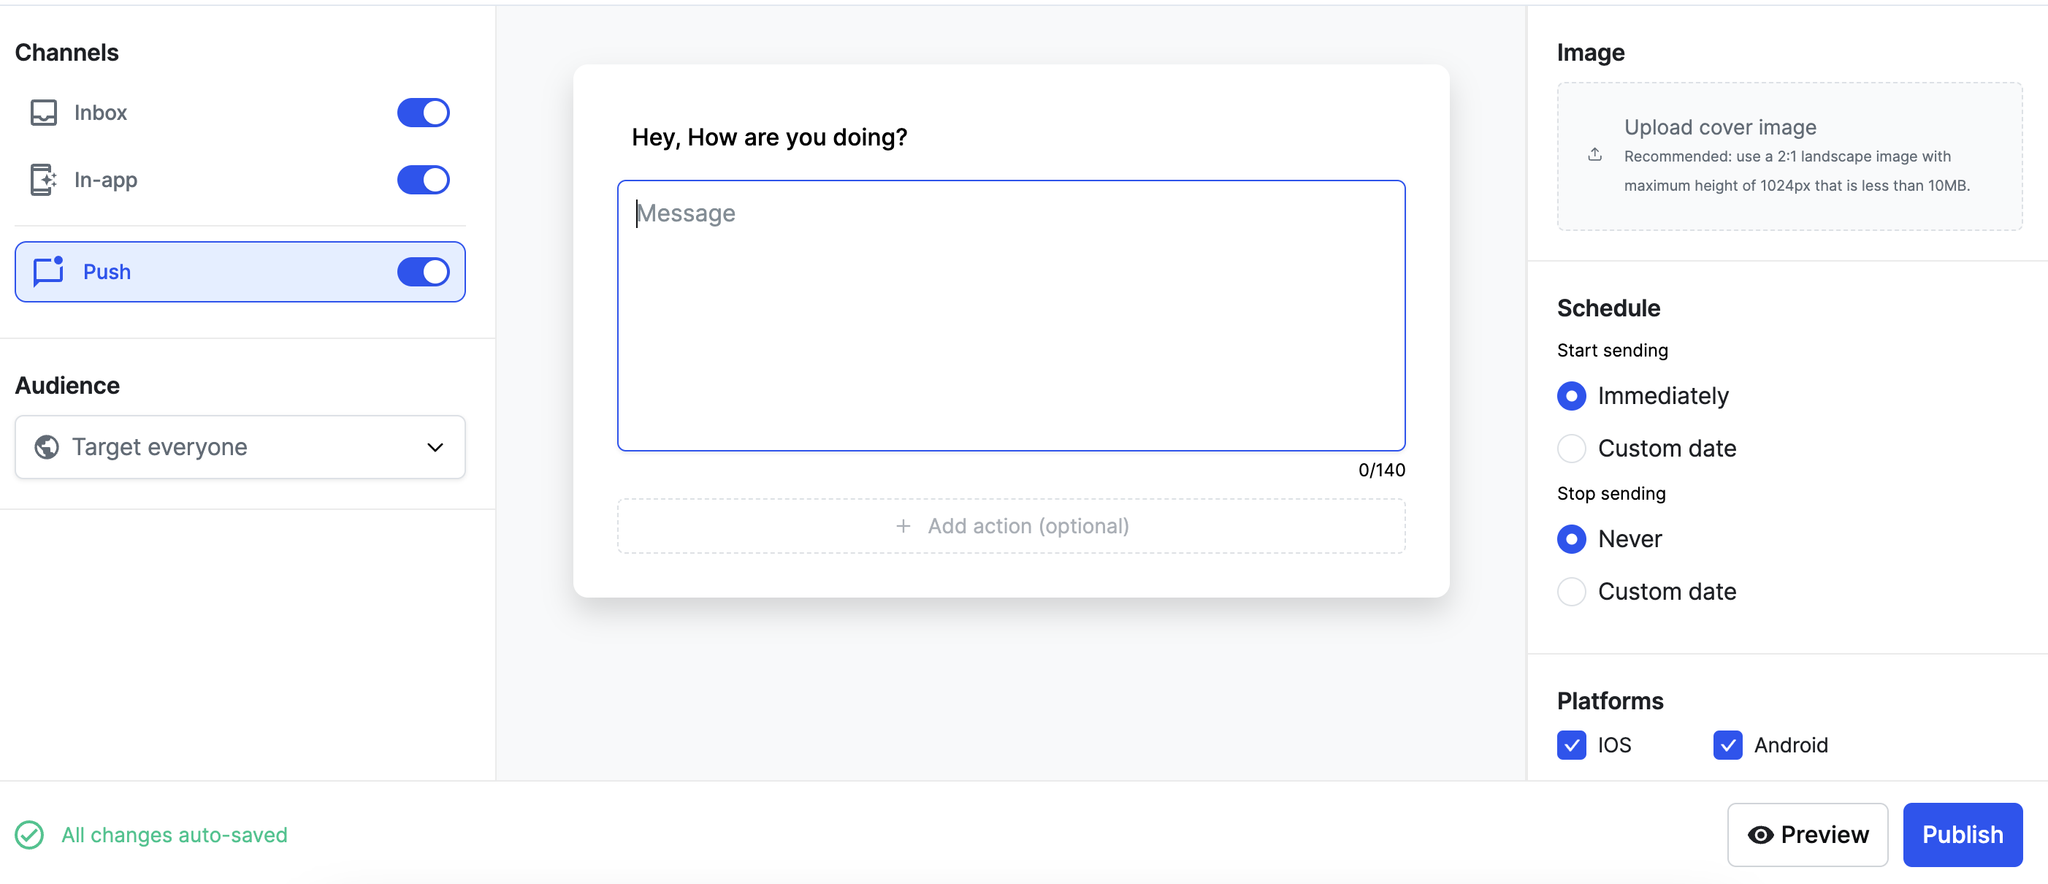
- Navigate to the 1Flow dashboard and create a new announcement.
- Select "Push" from the Channel list.
- Fill in the required details and click "Publish."
Please note that it may take up to 5 minutes for the notification to be delivered.
Test Push Notification in Sandbox
For sandbox testing purposes, use the development API key. Remember to switch to the production API key before uploading your app to the App Store or distributing it via TestFlight.
- Enable Development Mode in the 1Flow dashboard: Go to Settings → Project → Push Notifications, and turn ON Development Mode. This mode automatically disables after 1 hour.
- Create a new API key for Development: Navigate to Settings → Project → API keys, and click "New API key". Name it appropriately and select "Development" as the type.
When configuring the OneFlow SDK for sandbox testing, use your development API key as follows:
swiftOneFlow.configure(DEVELOPMENT_KEY)
Before submitting your app to the App Store or deploying it via TestFlight, ensure you switch to the production API key in your code.